
What is an allocation?
Allocations are how we track a project's usage of computing resources. They are measured in Service Units (SUs). When a job runs on the HPC cluster, the total amount of requested hardware resources over a period of time is captured by the allocation as SUs. Allocations are also what grant HPC accounts to individual users and are required for access.
Research Computing offers two tiers of allocations: Standard and Paid. Standard allocations are no cost, give unlimited SUs, and must be renewed after a year. Paid allocations grant SUs with priority access in the job queue. See our Getting Started guide for a more detailed breakdown.
Who can request an allocation?
Only eligible PIs can request new allocations. If you are not eligible, you will not see the option to create a new project, and thus cannot request an allocation for the project. All users can use the tool to visualize their projects and resources granted to them.
What should I request?
All PIs should get started with a standard allocation for system access. From there, the need for queue priority can be assessed, and a paid allocation can be requested and used as needed.
Standard Allocation
Step 1: Request a project
If you don't already have a project within the resource portal, see our guide on Creating a Project
Step 2: Sign Up
Before you can request an allocation, you will need to agree to our terms of service.
After logging in, it will be toggled to show only the services you've already signed up for. To see the services you haven't signed up for yet, click 'Toggle to view available resources'
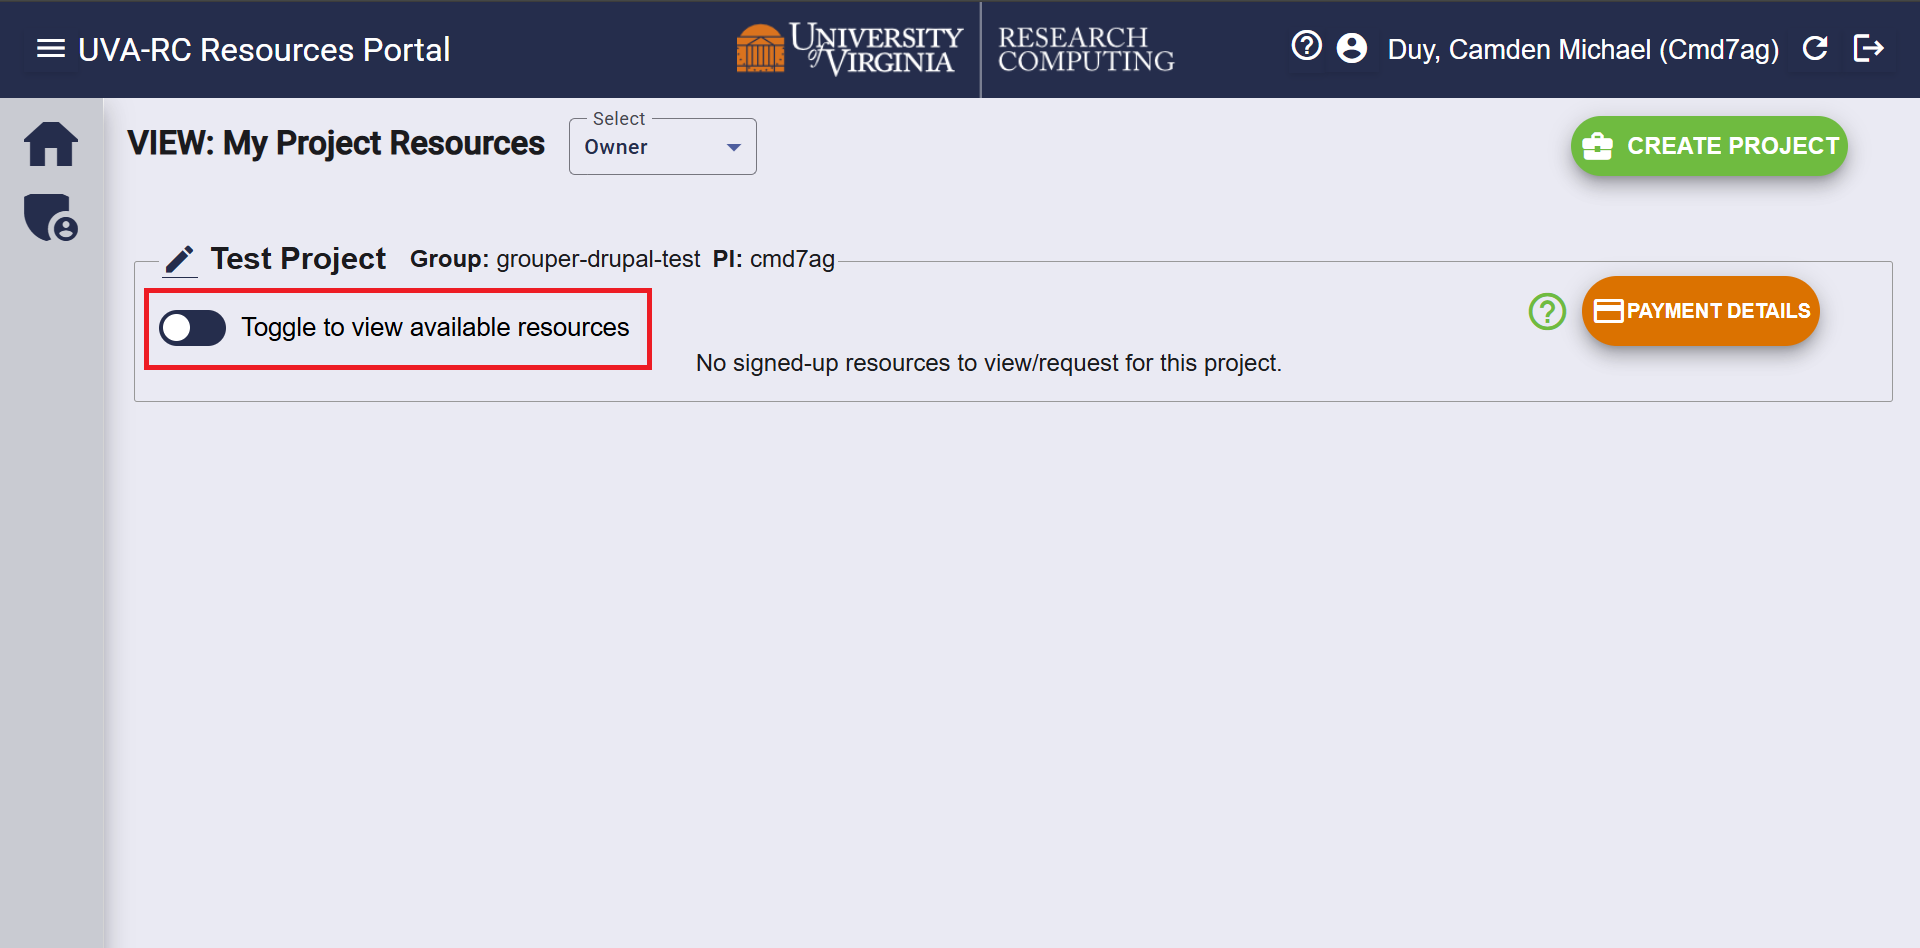
You can then sign up by clicking the Sign-Up button within the Actions column of your project, then read and accept the terms of service
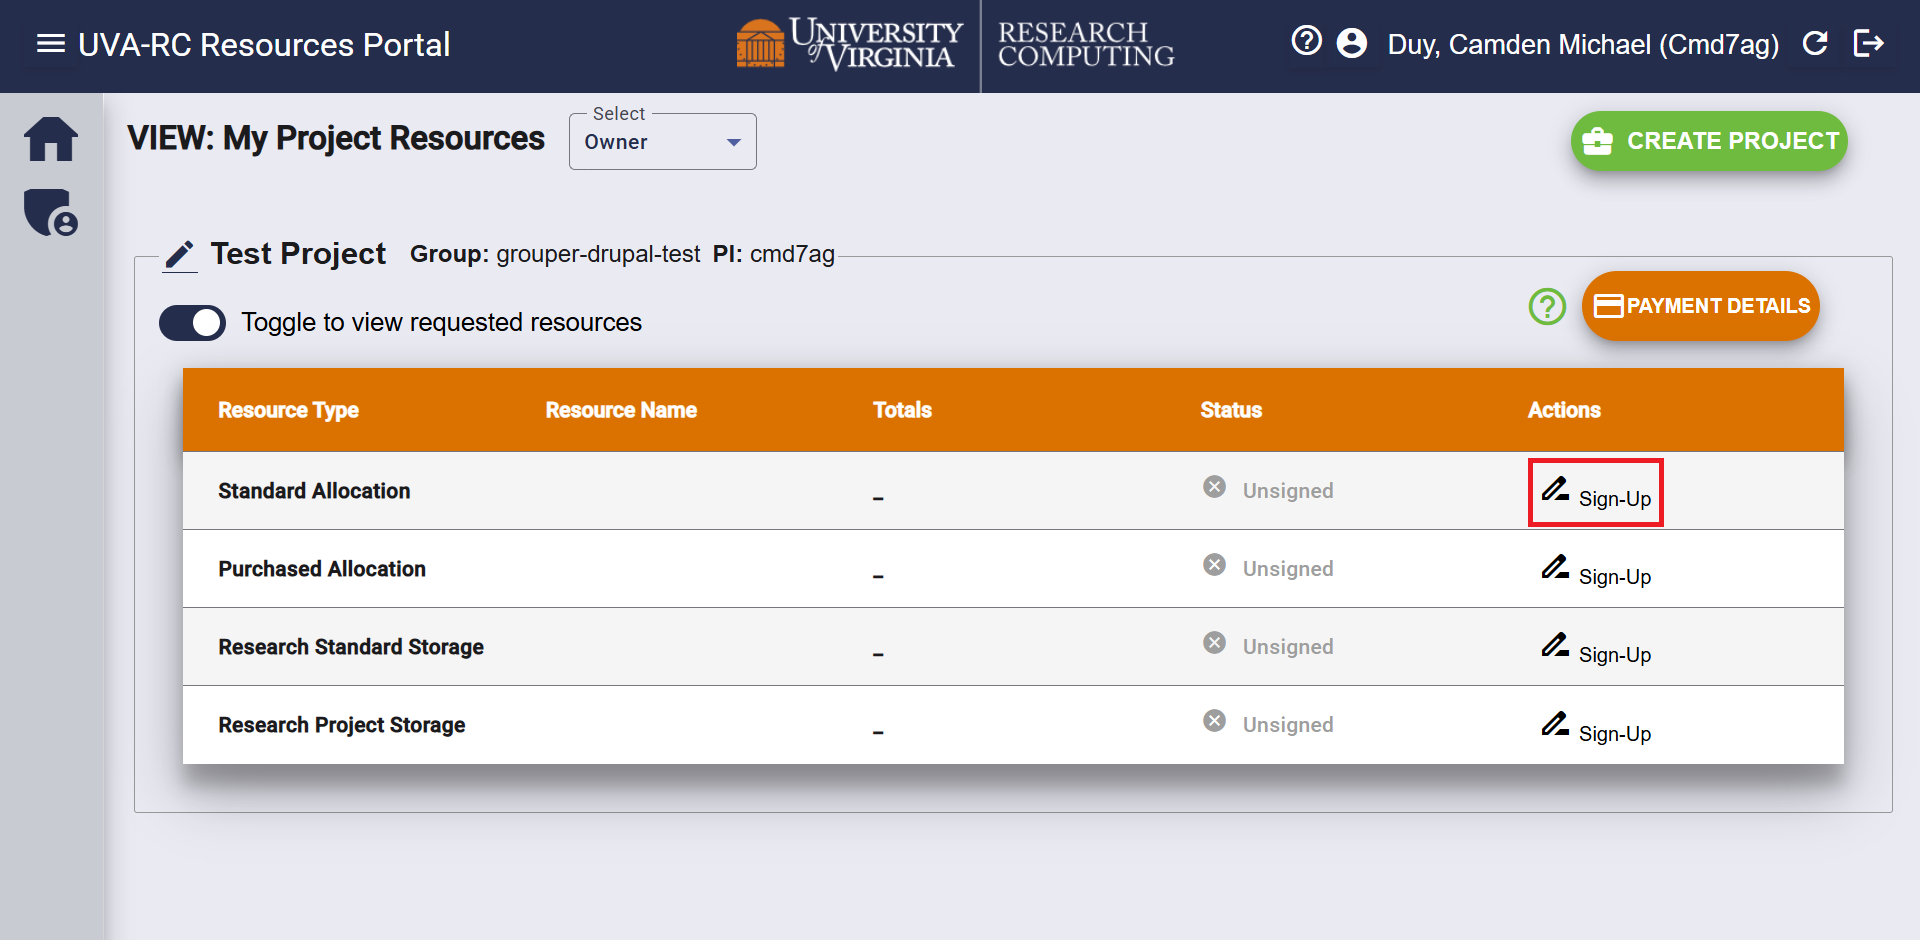
Step 3: Request Allocation
Now that you've signed up, you can request the allocation by first clicking the Use/View button in the Actions column.
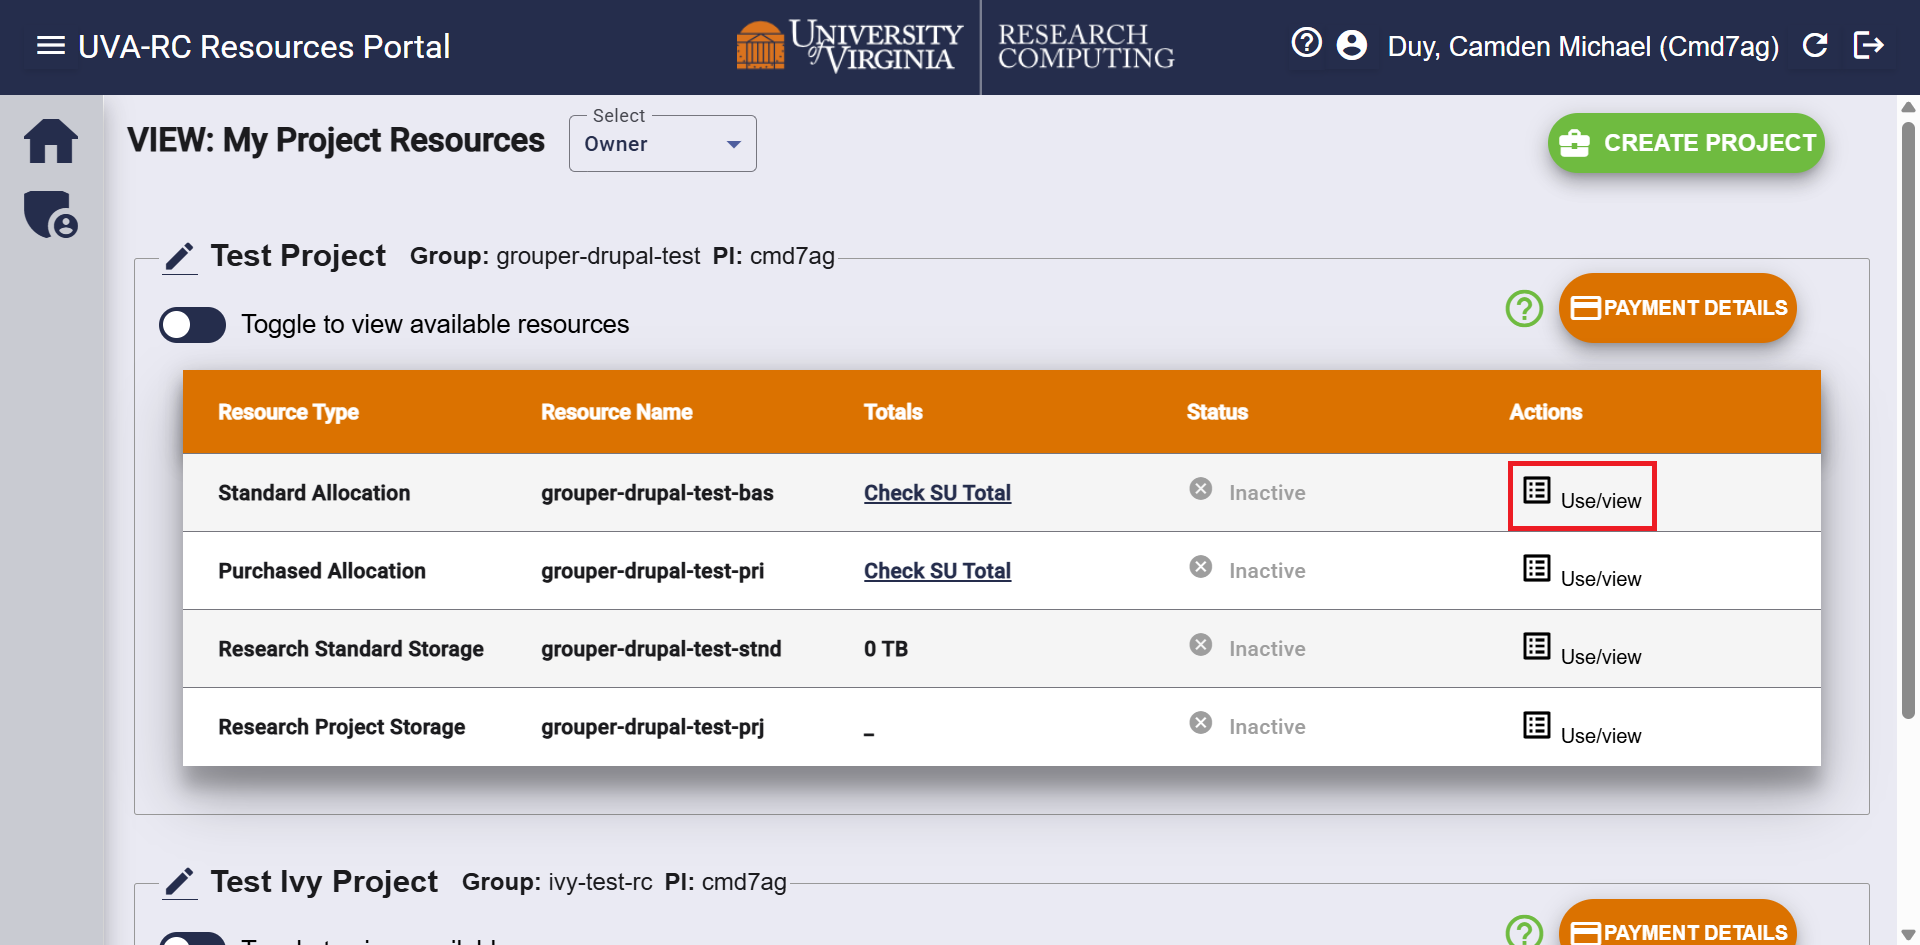
This will take you to a separate page, where you can submit the request using the green Request Resource button.
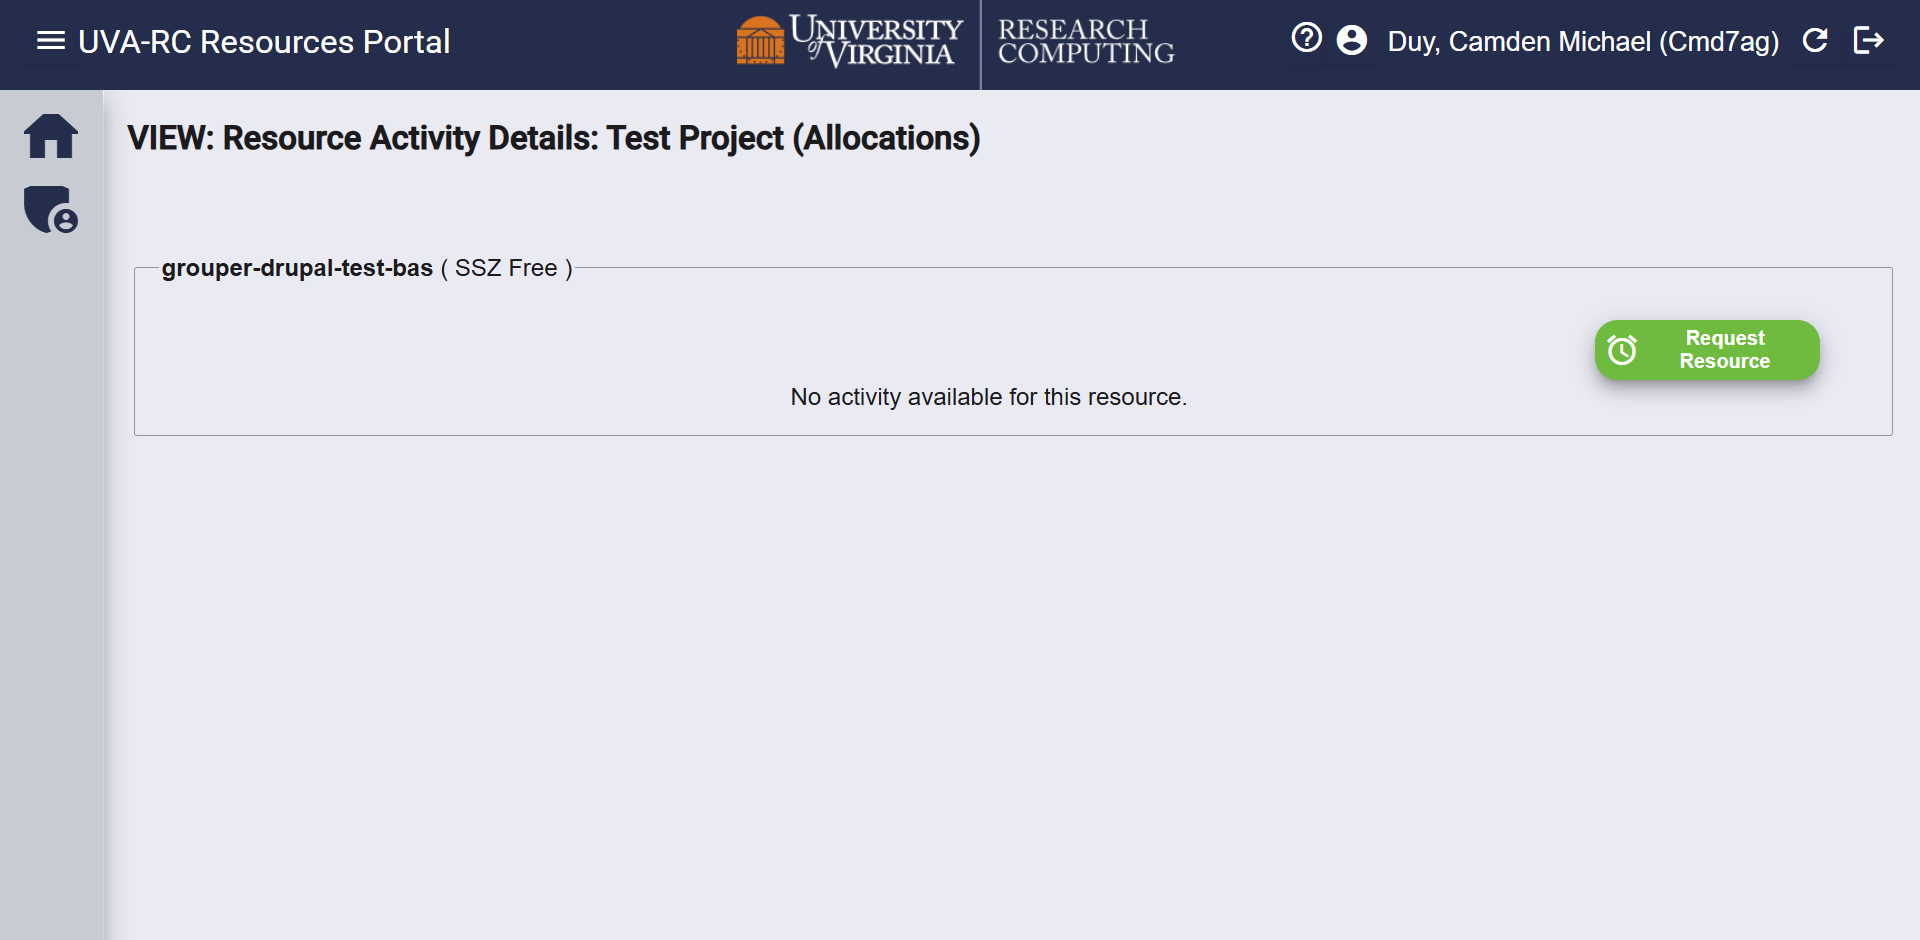
This will automatically generate a ticket for our user support team to verify. Once we've provisioned your allocation, you will receive an email notification, and the Status will switch to Active on the portal.
To return to the view of your project resources, click on the home icon in the left margin.
Step 4: Using the Allocation
After the standard allocation is created, an automated process will set up accounts for each Grouper group member. The process can take up to an hour, so please wait before attempting to log in. The standard allocation is named <Group-name>-bas. This is displayed in the Resource Name column on the portal.
We recommend viewing our Intro to HPC training material, or attending the weekly live session, to learn more about using the cluster and submitting jobs. Registration can be found on the linked page.
Paid Allocation
Before starting, you need to set up an FDM. See our guide on Setting up Payment Details if you haven't done this already.
Step 1: Request a project
If you don't already have a project with a standard allocation, we highly recommend doing this first before requesting a paid allocation. To get a standard allocation, see the guide above. If you already have a project, you can move on to the next step.
If you wish to use a different Grouper group to manage access to the paid allocation than your standard allocation, request a new project and continue. This may be desired if you only want a subset of your group to use the priority SUs.
Step 2: Sign Up
Before you can request an allocation, you will need to agree to our terms of service.
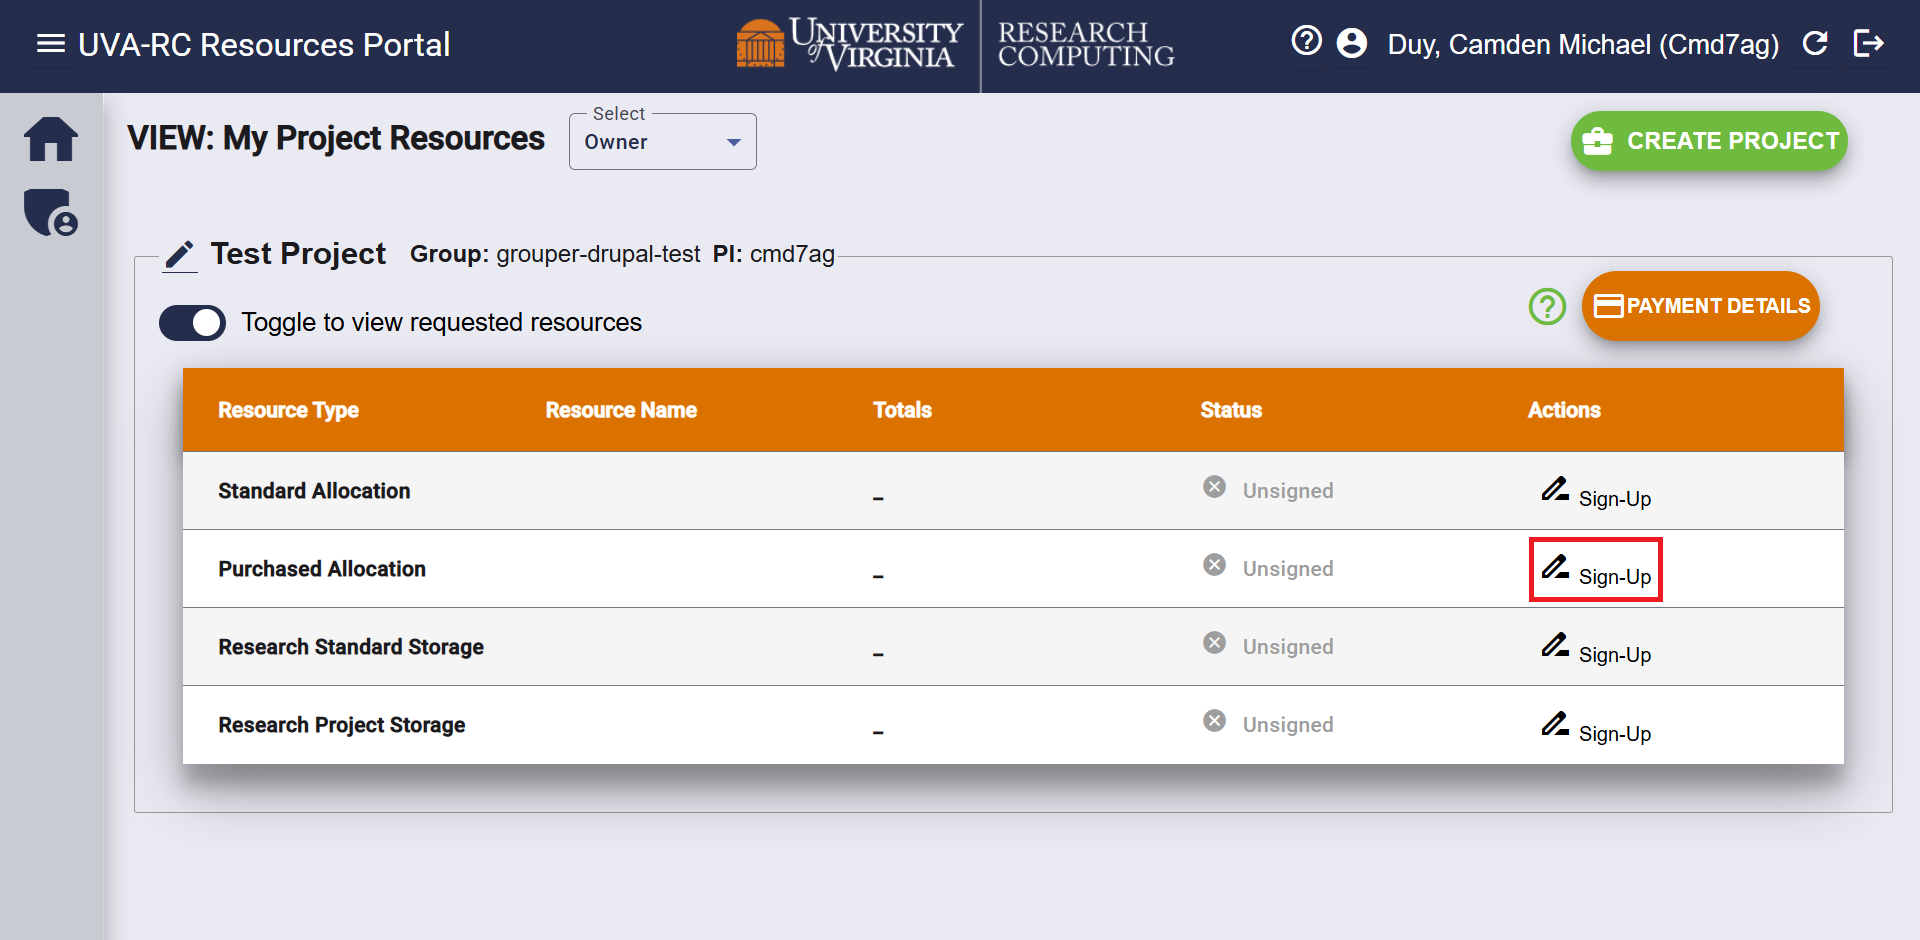
After logging in, it will be toggled to show only the services you've already signed up for. To see the services you haven't signed up for yet, click 'Toggle to view available services'
Then, click the Sign-Up button within the Actions column of your project, and read and accept the terms of service.
Step 3: Request Allocation
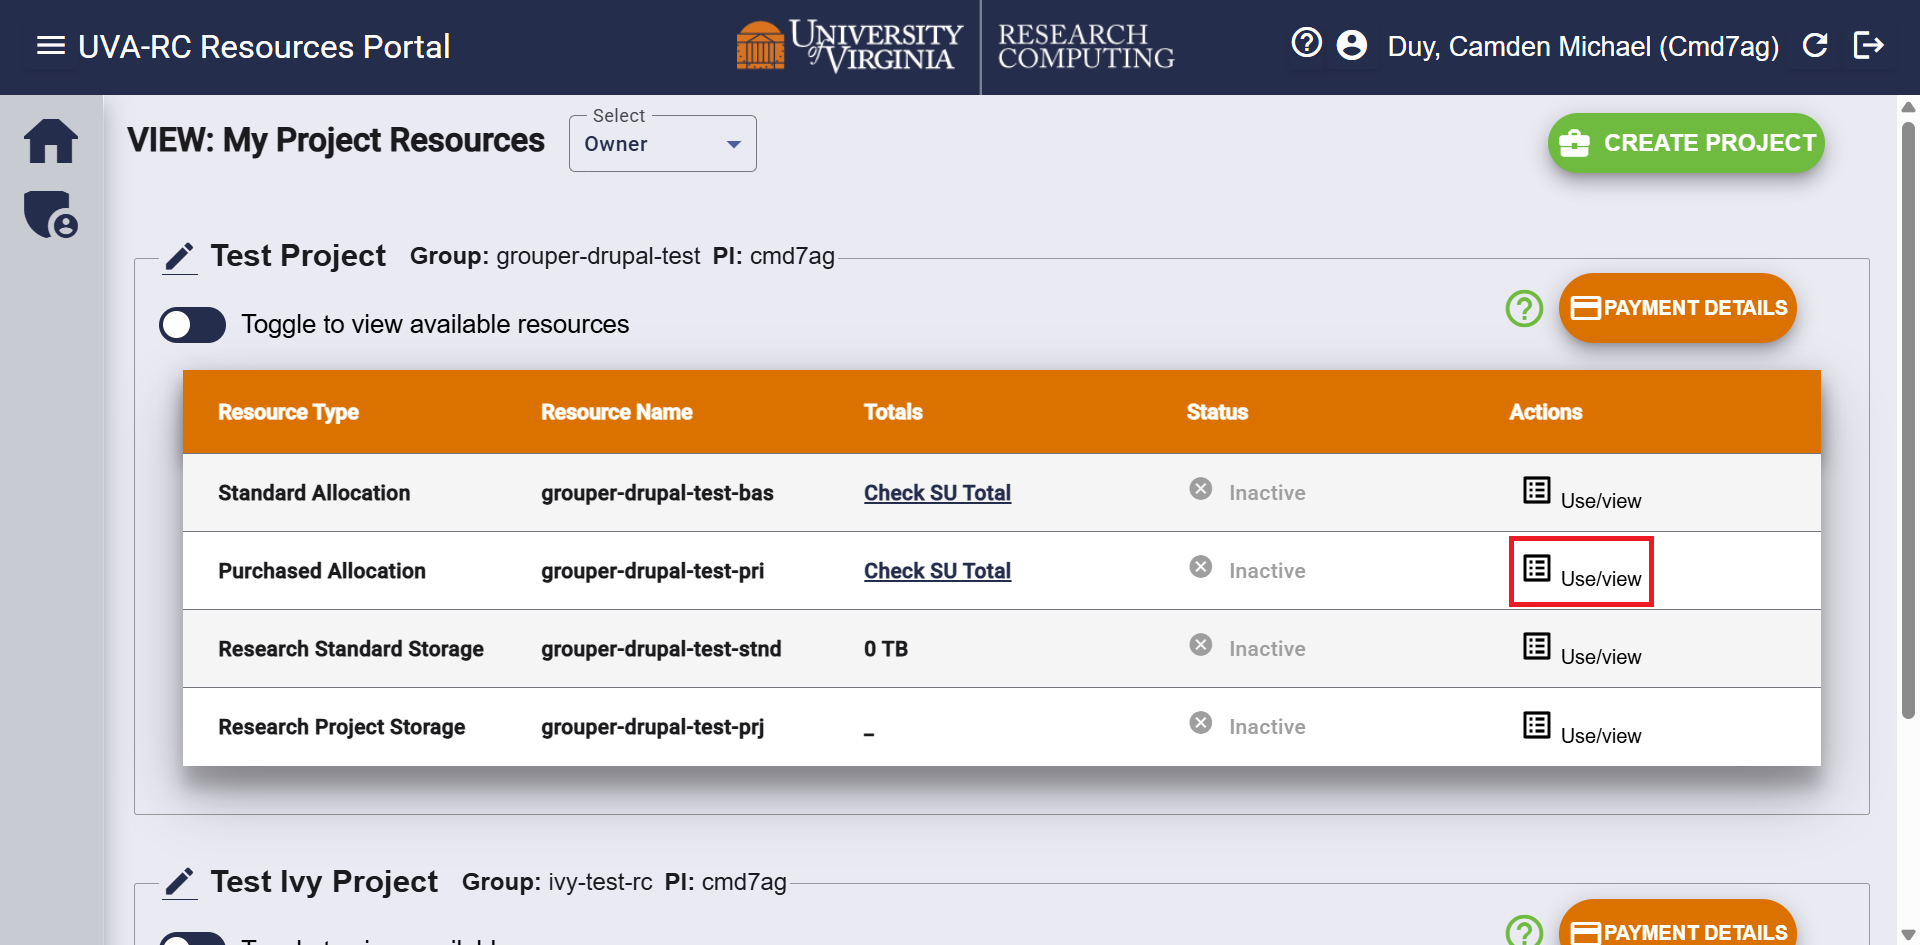
Now that you've signed up, you can request the allocation by first clicking the Use/View button in the Actions column.
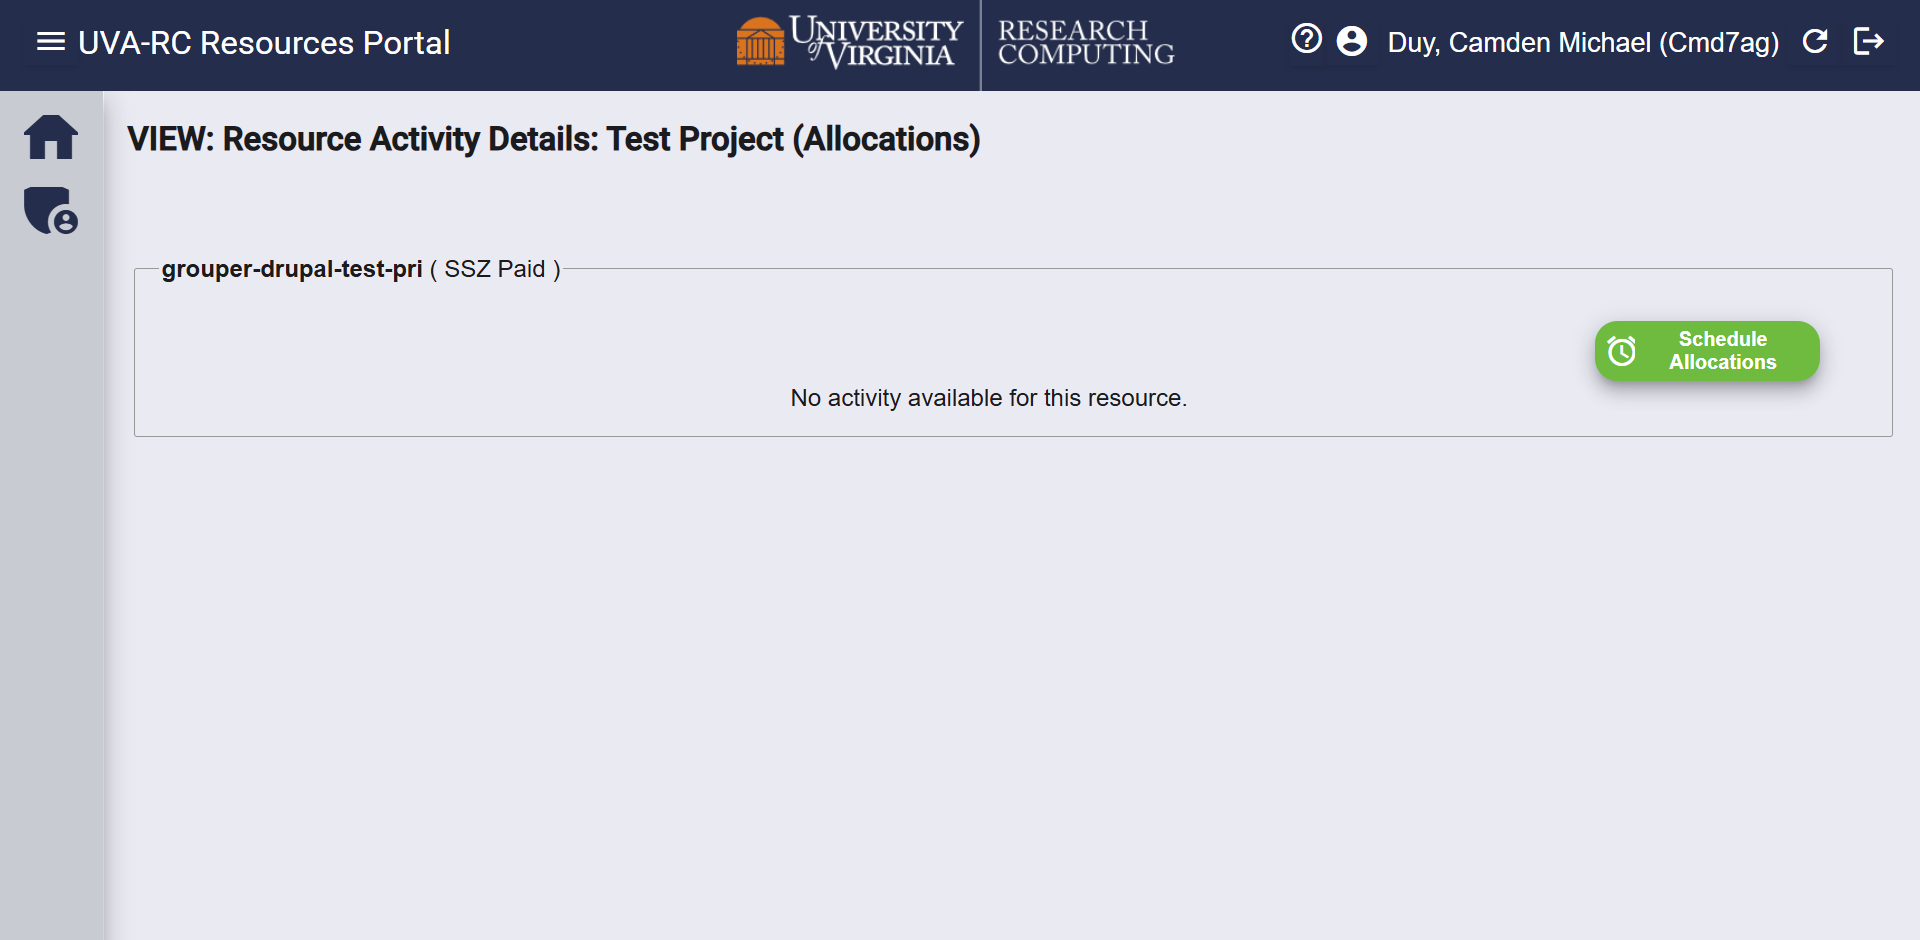
Then, click on the green Schedule Allocations button.
Provide the following information in the form:
- Pick an FDM from the dropdown.
- Choose a start date.
- The end date will automatically be chosen for July 1st of the following year.
- How many SUs you want to purchase.
- Our Pricing Guide has the rate per SU.
Click Add Request to submit. This will automatically generate a ticket for our user support team to verify. Before the request is completed, you have the option to cancel it by clicking the X button in the Actions column. Once we've provisioned your allocation, you will receive an email notification, and the Status will switch to Active on the portal.
To return to the view of your project resources, click on the home icon in the left margin.
Additional SUs may be requested by repeating Step 3
Step 4: Using the Allocation
If you have a standard allocation, then accounts should already be made for all members of the group. It can still take up to an hour for the system to update before the paid allocation can be used, so please wait before using the paid allocation to submit jobs.
When submitting a job, you can choose to use either your standard or paid allocations. The paid allocation is named <Group-name>-pri. This is displayed in the Resource Name column on the portal. Jobs submitted using a paid allocation will have higher priority in the queue.